Master The Art: How To Change Fishing Line On Reel Like A Pro
Looking to change the fishing line on your reel? No worries, we’ve got you covered! In this article, we’ll guide you through the simple steps of how to change fishing line on reel. Whether you’re a seasoned angler or just starting out, knowing how to properly replace your fishing line is essential for a successful fishing trip. So, grab your reel and let’s get started! First, we’ll discuss the importance of changing your fishing line regularly to maintain optimal performance. Then, we’ll dive into the step-by-step process, ensuring you can hit the water with confidence. Let’s jump right in!

How to Change Fishing Line on Reel
Changing the fishing line on your reel is an essential skill for any angler. Whether you’re a seasoned pro or a beginner, knowing how to properly change your fishing line will ensure that you have a smooth and successful fishing experience. In this comprehensive guide, we will walk you through the step-by-step process of changing your fishing line on a reel.
Section 1: Gather the Necessary Tools and Supplies
Before you begin changing your fishing line, it’s important to gather all the necessary tools and supplies. Here’s a list of items you’ll need:
- A new fishing line
- A pair of scissors or clippers
- A clean cloth
- A spooling station or a pencil
- A paper towel or tissue
Section 2: Remove the Old Fishing Line
The first step in changing your fishing line is to remove the old line from the reel. Follow these steps:
- Loosen the drag on your reel to prevent any tension.
- If your reel has a line clip, release the line from it.
- Locate the end of the fishing line attached to the spool.
- Using your scissors or clippers, cut the line close to the reel.
- Hold the line and slowly wind it off the reel, making sure it doesn’t tangle.
Section 3: Prepare the Reel
Once you have removed the old fishing line, it’s time to prepare the reel for the new line. Follow these steps:
- Inspect the reel for any dirt or debris.
- Using a clean cloth, wipe down the reel to remove any dirt or grime.
- Check the reel’s line spool for any signs of damage or wear.
- If needed, clean or replace the line spool.
Section 4: Attach the New Fishing Line
Now that your reel is ready, it’s time to attach the new fishing line. Here’s how:
- Thread the end of the fishing line through the rod guides starting from the tip.
- Attach the fishing line to the reel’s line spool by tying a secure knot.
- Wrap the fishing line around the spool, leaving a small amount of slack.
- Secure the line to the spool with an arbor knot.
- Hold the line taut and start reeling it onto the spool.
- Ensure that the line is evenly and tightly wound onto the spool.
Section 5: Properly Load the Fishing Line
Loading the fishing line onto your reel correctly is crucial for optimal performance. Follow these steps to ensure a proper load:
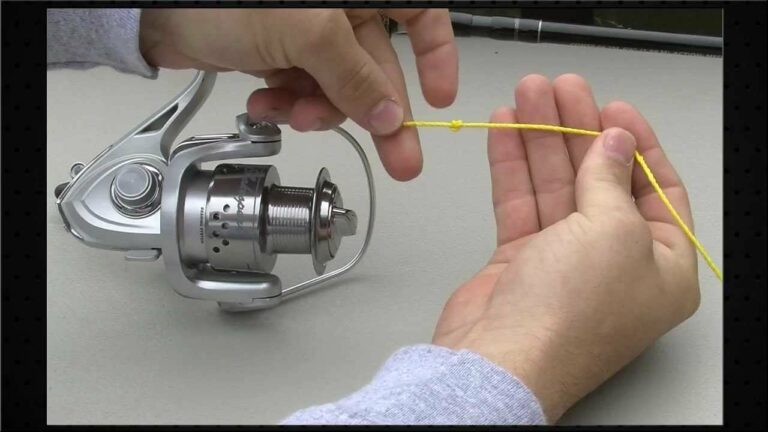
- Place the new spool of fishing line on the spooling station or hold it with a pencil.
- Apply slight tension to the line with your finger and start reeling it onto the reel.
- Slowly rotate the reel handle to evenly load the line onto the spool.
- Continue reeling until the line is about 1/8 inch from the spool’s rim.
- Cut off any excess line using your scissors or clippers.
Section 6: Test the Line and Adjust the Drag
Before you start fishing, it’s important to test the line and adjust the drag to ensure smooth operation. Here’s what you need to do:
- Hold the line between your thumb and forefinger.
- Apply gentle pressure and pull the line to test its strength and tension.
- Adjust the drag on your reel to the desired setting.
- Make sure the drag is tight enough to prevent the line from slipping, but not too tight to cause breakage.
Section 7: Final Checks and Maintenance
Before heading out for your fishing trip, perform these final checks and maintenance steps:
- Inspect the line for any weak spots, frays, or damage.
- Replace the line if necessary.
- Apply a small amount of reel oil to the moving parts of the reel.
- Check that all screws and components are secure.
Section 8: Properly Dispose of the Old Line
When disposing of the old fishing line, it’s crucial to do so responsibly to protect the environment. Follow these guidelines:
- Collect the old fishing line and place it in a plastic bag or container.
- Dispose of it in a designated recycling bin or at a fishing line recycling facility.
- Avoid throwing it in regular trash bins or leaving it on the ground.
Section 9: Practice Makes Perfect
Changing the fishing line on your reel may seem daunting at first, but with practice, it becomes second nature. Don’t be discouraged if it takes a few attempts to master the process. Remember, practice makes perfect, and soon you’ll be changing your fishing line with ease.
Section 10: Conclusion
In this guide, we’ve covered the step-by-step process of changing the fishing line on your reel. By following these instructions and tips, you’ll be able to maintain and optimize the performance of your fishing gear. Properly changing your fishing line ensures a smooth and enjoyable fishing experience. So, grab your tools, gather your supplies, and start mastering the art of changing fishing line on your reel today!
Frequently Asked Questions
How do I change the fishing line on my reel?
To change the fishing line on your reel, follow these steps:
- Start by removing the old fishing line from the reel. Unwind it carefully and discard it properly.
- Clean the reel spool and make sure it’s free from any debris or tangles. This will ensure smooth line retrieval.
- Choose the right fishing line for your specific needs. Consider factors such as the type of fishing you’ll be doing, the target species, and the reel capacity.
- Thread the new line through the rod guides, starting from the tip and working your way down to the reel.
- Secure the line to the reel spool using an arbor knot or another suitable knot. Make sure it is tight and won’t slip under pressure.
- Spool the line onto the reel by turning the reel handle. Apply slight tension to ensure the line goes on evenly and without twists.
- Leave a small gap between the line and the spool rim, ensuring it doesn’t overfill and cause casting issues.
- Trim off any excess line, leaving about 1/8 inch to prevent slippage.
- Finally, test the reel to ensure the line is properly loaded and the drag system is functioning correctly.
What type of fishing line should I use for my reel?
The type of fishing line you should use depends on several factors, such as the fishing technique, target species, and reel specifications. Monofilament lines are versatile and widely used, suitable for various fishing applications. Fluorocarbon lines are known for their excellent invisibility in water and abrasion resistance, making them ideal for situations where fish are line-shy or in rocky areas. Braided lines provide high strength and sensitivity, making them a popular choice for heavy cover or deep-water fishing. Consider your fishing needs and consult local anglers or tackle shops for specific recommendations.
How often should I change the fishing line on my reel?
It’s recommended to change your fishing line at least once a year or more frequently if you frequently fish in harsh conditions or notice any signs of wear and tear. Over time, fishing line can become weak, frayed, or damaged, decreasing its strength and performance. Regularly inspect your line for nicks, thin spots, or any visible damage. If you notice any issues, it’s best to replace the line to prevent potential line breaks and lost fish.
Can I reuse the old fishing line?
It’s generally not recommended to reuse old fishing line. Used line may have weakened or stretched, increasing the risk of line breaks and lost fish. Additionally, old line may have accumulated debris or knots that can affect casting distance and accuracy. It’s best to replace the fishing line with a fresh one to ensure optimal performance and reliability.
Do I need any special tools to change the fishing line on my reel?
Changing the fishing line on your reel typically doesn’t require any special tools. However, a pair of scissors or line cutters will be useful for trimming off excess line. Some anglers also use a line spooling station or a pencil as a makeshift spool holder to facilitate the line spooling process. These tools can help streamline the line change process, but they’re not mandatory.
Final Thoughts
Changing the fishing line on a reel is an essential skill every angler should possess. By following a few simple steps, you can quickly and easily replace the line, ensuring optimal performance during your fishing trips. Start by removing the old line and cleaning the reel thoroughly. Then, prepare the new line by attaching it securely to the reel spool. Finally, wind the line onto the reel, making sure it is evenly distributed and tightly spooled. By mastering the process of changing fishing line on a reel, you can maintain the efficiency and effectiveness of your fishing gear.